The Ultimate Guide to Garden Seed Ordering for Your Home Vegetable Patch 

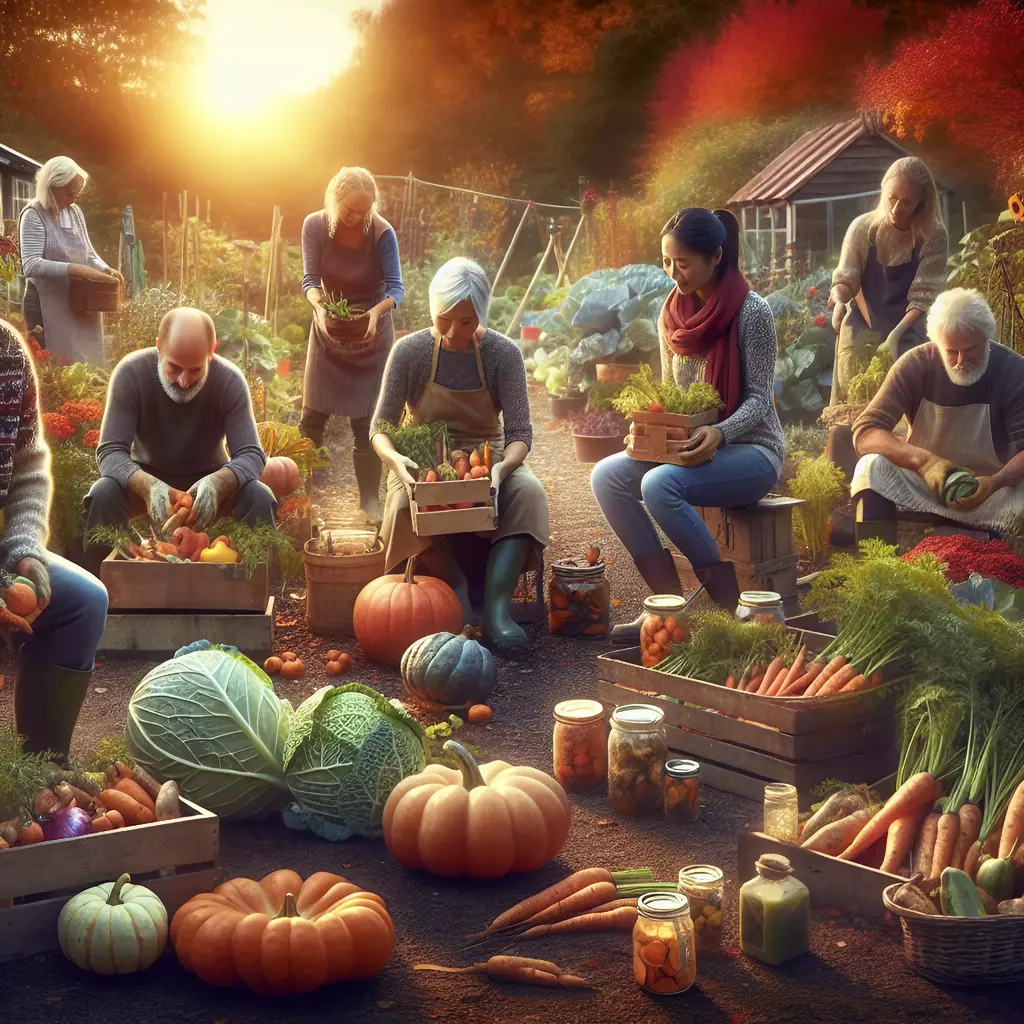
Planning your garden might not be as exciting as planting it, but it’s one of the most important steps to ensure a productive growing season. The colder months, when the garden is quietly resting under winter’s blanket, provide the perfect opportunity to dream, plan and prepare for the year ahead.  

For home gardeners, sustainability advocates, and organic enthusiasts alike, ordering seeds is a ritual of optimism, creativity, and possibility. This guide will walk you through the key steps to selecting and ordering the right seeds to grow the vegetable garden of your dreams. 

Vegetable Garden Planning — Seed Buying

Why Vegetable Gardening is Worth It 

Vegetable gardening is more than just a hobby—it’s a lifestyle choice that carries a multitude of benefits: 

  • Sustainability: Growing your own vegetables reduces reliance on store-bought produce that often travels long distances, cutting your carbon footprint. 
  • Health: Fresh-picked vegetables from your garden are often more nutritious and flavourful than anything you can buy. 
  • Savings: A small investment in seeds can yield a bountiful harvest, saving you money over the course of the season. 
  • Fulfilment: There’s nothing quite like the satisfaction of preparing a meal with ingredients you’ve grown yourself. 

Whether you’re a seasoned gardener or just starting out, planning your vegetable garden begins with selecting the right seeds. 

Step 1: Think About What Your Family Eats 

The first rule of vegetable gardening is simple—grow what you eat! If your family loves tomatoes, peppers, and courgettes, these should be your top choices. On the other hand, if no one in your household eats radishes, they’re probably not worth the space in your garden, no matter how quick or cute they are to grow. 

Take a moment to think about your regular meals. Which vegetables do you use most often? Do you want to experiment with heirloom varieties or stick to trusted staples?  

Pro Tip  

Make a list of your favourite vegetables and research the varieties available. Many seed companies offer unique options you can’t find in supermarkets, like purple carrots or striped tomatoes, which add colour and wow factor to your meals. 

Step 2: Consider the Space You Have 

The size of your garden determines how much you can grow, so it’s important to plan wisely. For those with smaller plots or container gardens, compact or bush varieties of vegetables like cherry tomatoes or dwarf beans are ideal. Larger spaces allow for sprawling plants like pumpkins and melons or rows of sweetcorn.  

Maximising productivity is key: 

  • Vertical Growing: Use trellises or stakes for climbing plants like peas and cucumbers to save ground space. 
  • Companion Planting: Pair plants strategically, like basil with tomatoes or carrots with onions, to deter pests and optimise growth. 

Pro Tip  

Sketch out your garden layout before placing your seed order. This will help you visualise how much room you have for each type of plant. 

Step 3: Match Seeds to Your Growing Conditions 

Not every vegetable grows well in every environment—your soil type, climate and sun exposure will all influence your success. Start by assessing your garden: 

  • Climate: Make sure the seeds you choose are suitable for your local growing season. For instance, some heat-loving plants like aubergines may struggle in shorter, cooler summers. 
  • Sunlight: Vegetables like tomatoes and peppers crave full sun, while leafy greens such as spinach and Swiss chard can thrive in partial shade. 
  • Soil Type: Test the pH and richness of your soil. Sandy, loamy, or clay soils each influence plant growth differently. Amend your soil as needed for optimal results. 

Many seed packets have detailed growing instructions that include ideal conditions. Pay close attention to these when ordering seeds. 

Step 4: Be Honest About Your Time Commitment 

Gardens—like any living thing—require nurturing. Some vegetables, like lettuce or radishes, are low-maintenance and grow quickly, while others, such as tomatoes and peppers, demand frequent attention. 

Consider how much time you can realistically dedicate to your garden: 

  • Low-Maintenance Veggies: Radishes, courgettes, cucumbers. 
  • High-Maintenance Veggies: Tomatoes, peppers, brassicas (cabbage, broccoli). 

If you have limited time, focus on hardy vegetables that are forgiving to neglect and adapt well to varying conditions.  

Pro Tip  

Install soaker hoses or drip irrigation to cut down on watering time and opt for mulch to suppress weeds and retain soil moisture. 

Step 5: Plan for Quantity 

How much do you want to harvest? It’s easy to over-order seeds, but it’s also possible to underestimate your needs. To strike the right balance: 

  • Start with Seed Packet Information: Many packets indicate the number of seeds and how much area they will cover. 
  • Plan for Succession Planting: To ensure a continuous harvest, plant crops like lettuce and beans every few weeks throughout their growing season. 
  • Avoid Wastage: Some seeds, like carrots and onions, are ideal for storage if harvested in bulk. Meanwhile, crops like cucumbers and tomatoes are better enjoyed as fresh produce or preserved as chutneys and sauces. 

If it’s your first time growing vegetables, start small and increase quantities as you gain confidence.  

Step 6: Select Your Seed Provider 

Not all seeds are created equal, so choosing a reputable seed supplier is vital. These ensure sustainable practices that align with your gardening and environmental values. 

Pro Tip  

Many seed companies have detailed online catalogues categorised by vegetables, seasonality, and conditions, making it easier to narrow down your choices. Some even offer pre-selected packs for beginners. 

Order Your Seeds and Start Preparing for Spring 

Once you’ve finalised your seed selection, it’s time to order and prepare for the season ahead. While waiting for your seeds to arrive: 

  • Amend your soil with compost or organic matter. 
  • Lay out your garden plan and gather necessary tools. 
  • Research ideal planting times for your chosen seeds. 

When the seeds arrive, store them in a cool, dry place until planting begins. This exciting stage is just around the corner! 

Sow It Grow It and Feast! – Grow Food to Feed a Family

Sow, Grow, Enjoy! 

There’s nothing more rewarding than stepping into your garden, picking fresh produce, and knowing you’ve grown it yourself. Ordering seeds is just the first step in this fulfilling process. With careful planning and a bit of elbow grease, you can cultivate a thriving vegetable patch that feeds both your body and soul. 

Happy planting 🍅

Further Reading: The Benefits of Growing your own Vegetables

Homegrown Christmas Lunch: Harvesting the Perfect Vegetables for a Memorable Feast

The Christmas season is fast approaching, and what better way to celebrate than with a delicious, homegrown Christmas lunch? As gardeners we have a unique opportunity to cultivate our own vegetables for this special occasion. Not only does it add a personal touch to our feast, but it also ensures that our dishes are made with the freshest ingredients possible.

Planning Your Vegetable Garden

Before diving into the specific vegetables you can grow, it’s important to plan your garden accordingly. Consider factors such as available space, sunlight exposure, and the time required for each crop to mature. Start by assessing your garden area and determining which vegetables will thrive in your specific conditions. Remember that some crops may require a longer growing season or protection from frost if you’re planning a winter harvest.

Root Vegetables: The Foundation of Your Feast

Root vegetables are not only versatile but also an essential component of any Christmas meal. Here are some popular options that can be successfully grown in the UK:

1. Potatoes

No Christmas dinner is complete without perfectly roasted potatoes. Varieties like Maris Piper or King Edward are well-suited for roasting due to their floury texture and ability to crisp up nicely on the outside whilst remaining fluffy on the inside.

2. Carrots

Roasted carrots add vibrant colour and natural sweetness to your festive spread. Choose varieties like Chantenay or Autumn King for their excellent flavour and ability to thrive in cooler temperatures.

3. Parsnips

Parsnips offer a delightful earthy taste and pair wonderfully with roasted meats or vegetarian alternatives. Consider growing Gladiator or Hollow Crown parsnips for their tender, sweet roots.

4. Beetroot

Don’t overlook the rich and vibrant beetroot when planning your Christmas menu. This versatile vegetable can be used in salads, roasted as a side dish, or even incorporated into dips and spreads.

Leafy Greens: Freshness and Flavour Galore

Leafy greens are not only nutritious, but also provide a burst of freshness to your festive feast. Here are some varieties that are well-suited for a winter harvest:

1. Kale

Kale is a robust green that thrives in cooler temperatures, making it an ideal choice for a homegrown Christmas lunch. Its deep green leaves offer a slightly bitter taste that pairs well with roasted meats or can be enjoyed on their own as a sautéed side dish.

2. Brussels Sprouts

Brussels sprouts have long been associated with holiday meals, and growing them at home allows you to experience their true flavour potential. Choose varieties such as Bosworth or Trafalgar for tender sprouts that will melt in your mouth.

3. Spinach

Spinach is an excellent addition to any Christmas menu due to its versatility and nutritional benefits. Whether used as a base for salads or sautéed as a side dish, freshly harvested spinach adds vibrancy to your plate.

Cruciferous Delights: Cabbage and Cauliflower

Cabbage and cauliflower are two vegetables that can elevate your Christmas lunch to new heights with their unique flavours and textures:

1. Savoy Cabbage

Savoy cabbage offers beautiful crinkled leaves and a mild yet distinctive flavour profile. It can be enjoyed raw in salads or cooked alongside other vegetables for added depth of flavour.

2. Romanesco Cauliflower

For an eye-catching addition to your festive table, consider growing Romanesco cauliflower—a mesmerising vegetable with intricate fractal patterns. Its nutty flavour and stunning appearance make it a memorable centrepiece.

Festive Herbs: Adding Flavour and Aroma

No Christmas lunch is complete without the aromatic presence of herbs. Growing these herbs in your garden ensures that you have an abundant supply for all your culinary endeavours:

1. Rosemary

Rosemary’s woody fragrance and robust flavour complement roasted meats, potatoes, and vegetables perfectly. It can also be used to infuse oils or vinegars for added depth.

2. Thyme

Thyme is another herb that pairs beautifully with a variety of dishes, particularly those featuring root vegetables or poultry. Its delicate leaves add a subtle earthy flavour to your creations.

Harvesting Joy and Flavour

Growing your own vegetables for a homegrown Christmas lunch adds an extra layer of joy and satisfaction to the holiday season. Not only do you have the opportunity to taste the freshness and quality of your homegrown produce, but you also have full control over the varieties you choose to cultivate. From hearty root vegetables to vibrant greens, each element of your feast will bear the mark of your green thumb. So roll up your sleeves, plan your vegetable garden, and prepare for a truly memorable Christmas meal that showcases the bounties of nature right at your doorstep.

Our Christmas Shop is now open🎅🎉!

Further reading: BBC Good Food – Christmas Food

Chilli Plant Care: From Sowing Seeds to Overwintering

Planting Chilli Seeds in Late Winter

Sowing chilli seeds in late winter is an excellent way to kickstart your growing season in the UK. Chillies need a long growing period, so starting them early indoors ensures they are well-established by the time warmer weather arrives. Late winter planting allows you to harness the increasing daylight hours, aiding in robust seedling development.

To begin, sow your chilli seeds indoors around February or March. Use seed trays or small pots filled with a well-draining seed compost, and plant the seeds at a depth of about 6mm. Consistently moist soil and a temperature of around 21°C will encourage germination. Once the seedlings have developed a couple of true leaves, they can be transplanted into larger pots.

Utilising seed trays or small pots filled with well-draining seed compost, plant the seeds at a depth of approximately 6mm. Keep the soil consistently moist and maintain a temperature of around 21°C to promote germination. When the seedlings have developed a couple of true leaves, they can be transplanted into larger pots.

Additionally, using a propagator or covering the pots with a plastic dome can help retain humidity and create an optimal environment for the seeds. Ensuring that the seedlings receive ample light, either from a south-facing window or under grow lights, is crucial for healthy development.

Spacing is also essential; avoid overcrowding to give each seedling enough room to grow. As the seedlings grow, make sure they are gradually acclimatised to outdoor conditions by hardening them off. This involves placing them outside for a few hours each day, gradually increasing the time over a week or two.

By adhering to these steps, you set the stage for a successful chilli growing season, right from the start in late winter.

Advantages of Cultivating Chilli Plants

Growing your own chilli plants offers a multitude of advantages. Besides being cost-effective, cultivating chillies at home ensures a fresh, ready supply of this versatile ingredient. The freshness of homegrown chillies can significantly enhance the flavour profile of your dishes, making them stand out.

One of the joys of growing chillies is the opportunity to explore a wide array of varieties. From mild and sweet to extremely hot, you can experiment with different types that are often unavailable in supermarkets. This variety allows you to diversify your culinary creations and introduce new flavours to your meals.

Home gardening also provides the assurance that your produce is free from harmful pesticides and chemicals. By controlling the growing environment, you can ensure that your chillies are organic and safe to consume. Additionally, gardening is a therapeutic activity that can reduce stress and improve mental well-being.

Chilli plants are also known for their ornamental value. With their vibrant green foliage and colourful fruits, they can brighten up any garden space or windowsill. Whether you have a sprawling garden or just a small balcony, chilli plants can adapt to various growing conditions, making them suitable for urban and rural settings alike.

Another significant advantage is the educational aspect. Growing chillies can be an excellent way for children and adults alike to learn about plant biology, cultivation techniques, and the importance of sustainable practices. This hands-on experience can foster a deeper appreciation for nature and encourage healthier eating habits.

Overall, the benefits of growing your own chilli plants extend beyond the obvious culinary perks, contributing to a healthier lifestyle, a more engaging gardening experience, and a more beautiful living space.

How to Successfully Sow Chilli Seeds

To successfully sow chilli seeds, start by choosing high-quality seeds. Prepare a seed tray or small pots with a seed-starting mix, ensuring the medium is well-draining. Sow the seeds about 6mm deep and cover them lightly with soil. After planting, water gently to moisten the soil, taking care not to waterlog it. Cover the trays or pots with a plastic dome or place them in a propagator to maintain humidity, which aids germination. Keep the temperature around 21°C to promote optimal germination conditions.

Once the seedlings emerge, ensure they receive ample light. A south-facing window is ideal, but grow lights can also be effective if natural light is insufficient. When the seedlings develop a couple of true leaves, it’s time to transplant them into larger pots. Use a well-draining potting mix to support healthy root growth.

Spacing is essential to avoid overcrowding and ensure each seedling has enough room to grow. As the seedlings mature, harden them off by gradually exposing them to outdoor conditions. Start by placing them outside for a few hours each day, increasing the time incrementally over a week or two. This process helps the plants acclimatise to outdoor temperatures and reduces transplant shock.

Consistent watering is crucial for chilli seedlings, but avoid overwatering as this can lead to root rot. Additionally, consider using a balanced, water-soluble fertiliser to support early growth. By following these steps, you set the foundation for robust and healthy chilli plants, ready for a productive growing season.

Preventing Viruses and Pests in Chilli Plants

Chilli plants are prone to various viruses and pests, which can adversely affect their growth and yield. Common pests such as aphids, spider mites, and whiteflies can cause significant damage. Viral infections like mosaic viruses are also a concern. To combat these threats, it is essential to adopt a comprehensive pest management strategy.

Regularly inspect your chilli plants for any signs of pests. Early detection allows for prompt action, such as removing pests by hand or applying insecticidal soap. Introducing beneficial insects, like ladybirds, can also help control pest populations as they prey on common chilli pests.

Good air circulation is vital in preventing fungal diseases, which thrive in humid conditions. Ensure adequate spacing between plants and avoid overcrowding, which can restrict airflow. Avoid overhead watering as it can create a damp environment conducive to fungal growth. Instead, water at the base of the plant to keep the foliage dry.

Crop rotation is an effective way to minimise the risk of soil-borne diseases. Avoid planting chilli plants in the same location year after year, as this practice can lead to a build-up of pathogens in the soil. Rotating crops disrupts the life cycle of pests and diseases, reducing their impact.

Sanitise gardening tools regularly to prevent the spread of viruses and bacteria. Using contaminated tools can transfer pathogens from one plant to another, exacerbating the problem.

Additionally, consider using organic mulch around the base of your plants to retain moisture and suppress weeds. Mulching also helps in maintaining soil health, creating a more resilient growing environment for your chilli plants.

By following these preventative measures, you can significantly reduce the risk of viruses and pests, ensuring a healthier and more productive chilli plant.

Nourishing Your Chilli Plants

To ensure a healthy and fruitful harvest, it is crucial to provide your chilli plants with the right nutrients. Start by incorporating a balanced fertiliser into the soil before planting. As the plants grow, switch to a high-potassium feed to promote flowering and fruiting.

A feeding schedule of every two weeks during the growing season is generally sufficient. Additionally, ensure the soil remains consistently moist but not waterlogged, as this helps in nutrient uptake. Mulching can also help retain soil moisture and suppress weeds.

Regularly check the leaves for signs of nutrient deficiencies, such as yellowing or stunted growth, and adjust your feeding regimen accordingly. Liquid seaweed extract is an excellent supplementary feed, rich in trace elements and growth hormones that can enhance overall plant health.

For organic growers, compost tea or well-rotted manure can serve as an effective natural fertiliser, providing a steady release of nutrients. Be cautious with nitrogen levels, as excessive nitrogen can lead to lush foliage at the expense of fruit production.

Also, consider using Epsom salts as a magnesium supplement if your plants show signs of magnesium deficiency, like yellowing between leaf veins. Simply dissolve a tablespoon of Epsom salts in a gallon of water and apply as a foliar spray every couple of weeks.

By maintaining a balanced nutrient regimen, you set the stage for robust and productive chilli plants.

Caring for Chilli Plants Through Winter

Overwintering chilli plants can effectively extend their lifespan. As temperatures drop, move the plants indoors to a bright, frost-free location. Reduce watering to prevent root rot and trim back the foliage to conserve the plant’s energy. Refrain from fertilising during this dormant period since the plant’s nutrient needs will be minimal. Regularly check for pests and diseases, treating any issues promptly to keep the plant healthy.

When spring arrives and the risk of frost has passed, gradually reintroduce the plants to outdoor conditions by placing them outside for a few hours each day, incrementally increasing the time. This process helps the plants acclimatise to the changing weather, reducing transplant shock.

Once the plants are fully acclimatised, resume normal watering and feeding schedules to encourage new growth and flowering. With proper care and attention, your chilli plants can thrive beyond a single season, rewarding you with a bountiful harvest year after year.

Further reading: Spice up your garden and grow chillies, Choosing the right chilli varieties for your garden and plate

Follow us on Instagram for daily gardening inspiration

Why Sow Broad Beans in Autumn?

Understanding Broad Beans

Broad beans, scientifically known as Vicia faba, are a type of legume cherished for their distinctive flavour and texture. They can be incorporated into various dishes, adding a nutty taste and creamy consistency. In addition to their culinary appeal, broad beans are packed with nutritional benefits. They are an excellent source of protein, fibre and essential vitamins and minerals, such as folate, iron, and potassium. This makes them a nutritious addition to any diet.

The broad bean plant itself is quite robust and can thrive in a range of conditions, which is one reason it has been cultivated for centuries across different regions. The plants typically grow to a height of 0.5 to 1.8 metres and produce pods containing 4-8 seeds each. The seeds can vary in colour from green to brown or even black, depending on the variety.

Broad beans are particularly well-suited to the UK climate, adapting well to cooler temperatures and thriving in the moist conditions common during the autumn months. This adaptability makes them an ideal crop for both amateur and experienced gardeners looking to extend their growing season.

When it comes to soil preferences, broad beans are not particularly fussy but do best in well-draining soil enriched with organic matter. They can tolerate a range of pH levels, although a slightly acidic to neutral soil is ideal. Given their nitrogen-fixing abilities, broad beans also contribute to improving soil health, benefiting not only themselves but also subsequent crops planted in the same location.

In terms of pests and diseases, broad beans are relatively hardy but can occasionally be affected by issues like blackfly infestations and fungal diseases such as chocolate spot. Regular monitoring and appropriate preventative measures can help keep these problems at bay.

Reasons to Cultivate Broad Beans

Broad beans play a crucial role in promoting soil health. As nitrogen-fixers, they naturally enrich the soil by converting atmospheric nitrogen into a form that plants can utilise. This reduces the reliance on synthetic fertilisers, making your gardening practice more eco-friendly. Additionally, broad beans can improve soil structure and fertility for subsequent crops.

Another advantage of growing broad beans is their early harvesting season. Planting them in autumn allows you to enjoy fresh beans by late spring or early summer, bridging the gap before other crops are ready for harvest. This extended growing season helps maximise the productivity of your garden space.

Broad beans are also relatively easy to grow, making them suitable for gardeners of all experience levels. Their ability to adapt to various soil conditions and tolerate cooler temperatures means they can thrive with minimal intervention. Regular monitoring and basic care are usually sufficient to ensure a healthy crop.

Moreover, broad beans can be an attractive addition to your garden. Their tall, upright plants and colourful flowers add visual interest, while also attracting beneficial insects such as bees, which help with pollination.

Finally, cultivating broad beans offers nutritional benefits. They are rich in protein, fibre and essential vitamins and minerals, making them a healthy addition to your diet. Incorporating homegrown broad beans into your meals ensures you have access to fresh, high-quality produce, enhancing both the flavour and nutritional value of your dishes.

Advantages of Planting in Autumn in the UK

One significant advantage of sowing broad beans in autumn is the favourable climate conditions in the UK during this season. The cooler temperatures and ample rainfall create an ideal environment for broad bean germination and early growth. Soil temperature is crucial as it affects important plant processes like nutrient uptake and root growth, which are essential for the development of broad beans.

Moreover, the reduced presence of pests and diseases in the cooler months helps the plants to establish themselves more robustly. This early establishment leads to healthier, more resilient crops by the time spring arrives. Autumn-sown broad beans often benefit from a head start, maturing earlier than those sown in spring, thus allowing for an earlier harvest.

Planting broad beans in autumn also means that gardeners can take advantage of the natural cycle of the seasons. The plants grow slowly over the winter, building a strong root system that supports vigorous growth in the spring. This slow and steady development results in robust plants that are better equipped to withstand adverse conditions.

Additionally, autumn planting helps to extend the growing season, making the most of the available garden space. With fewer gardening tasks typically required in the autumn compared to the busy spring season, there is more time to focus on proper planting and care.

Another benefit is the improvement of soil structure and fertility. Broad beans, being nitrogen-fixers, enhance the soil by adding essential nutrients, which can benefit subsequent crops planted in the same location. This natural enrichment reduces the need for synthetic fertilisers, promoting a more sustainable gardening practice.

Autumn Sowing Guide for Broad Beans

To sow broad beans successfully in autumn, start by choosing a sunny location in your garden that has well-draining soil. Preparing the soil is crucial; incorporate compost or well-rotted manure to ensure it is rich in essential nutrients.

Next, plant your seeds about 5 cm deep and 20-25 cm apart, spacing rows approximately 45 cm apart. This arrangement allows each plant ample room to grow and develop a strong root system. After sowing, lightly water the soil to help with seed germination, taking care to maintain moisture without causing waterlogging.

It’s also beneficial to use cloches or fleece to protect your seeds and seedlings from early frost. These coverings can help to maintain soil temperature and provide some protection against pests. In particularly wet conditions, consider raising the soil beds slightly to improve drainage and prevent the seeds from rotting.

As your broad beans begin to grow, keep an eye on soil moisture levels. While they do require consistent moisture, overwatering can be detrimental. Aim to keep the soil just moist, particularly during dry periods. Additionally, mulching around the base of the plants can help retain soil moisture and reduce the growth of weeds.

To further support young plants, you might consider using stakes or supports as they grow taller. This can prevent the plants from being damaged by strong winds or heavy rain. Regularly check for signs of pests or diseases, and take immediate action if any issues are detected to ensure healthy development.

By adhering to these guidelines, you can establish a healthy, productive crop of broad beans that will thrive through the winter and into the spring.

From Seedling to Harvest: Care Instructions

After your broad bean seedlings have emerged, they will require consistent care to reach their full potential. Watering is vital, particularly during dry periods, but it’s essential to strike a balance to avoid waterlogging. Broad beans benefit from a soil that remains consistently moist but not overly saturated.

Mulching around the plants can help retain moisture and suppress weed growth, reducing competition for nutrients. As your seedlings grow, consider using stakes or other supports to protect them from wind damage and heavy rain, which can otherwise cause the plants to topple.

Regular weeding is crucial to ensure your broad beans do not compete with other plants for vital nutrients. Monitor your plants closely for signs of pests like aphids or diseases such as chocolate spot. Early detection and prompt action can prevent these issues from affecting your crop. Natural pest control methods or suitable organic treatments can be effective in managing these problems.

Throughout the growing season, inspect your plants regularly to ensure they remain healthy and robust. Pinching out the tips of the plants when they reach about 15-20 cm can encourage bushier growth and potentially higher yields. This practice can also help deter blackfly infestations, as the pests are often attracted to the tender new growth.

Finally, keep an eye on soil health. Given that broad beans are nitrogen-fixers, they improve the nutrient content of the soil. Nevertheless, it’s beneficial to occasionally feed your plants with a balanced, organic fertiliser to support their development. Regular monitoring and timely interventions will help you achieve a successful and productive harvest of broad beans.

Broad Bean Harvesting: Timing and Techniques

Broad beans typically mature by late spring or early summer, depending on the variety and local climate conditions. When the pods feel plump and firm, it’s time to harvest. Using your fingers or a pair of scissors, gently pinch or cut the pods from the plant. Regular harvesting encourages the plant to continue producing beans, thereby extending your harvest period. Aim to pick the beans when they are young and tender, as they are at their most flavourful and nutritious at this stage. If left too long, the beans can become tough and less palatable. Post-harvest, broad beans can be stored in a cool, dry place or blanched and frozen for later use, ensuring you can enjoy your homegrown produce well beyond the growing season.

Further reading: The Benefits of Growing your Own Vegetables,  Garden Trends 2026: Reconnect with Nature and Future-Proof Your PlotCreate a Sanctuary Space: Your Haven of Calm at HomeDesign a Magical Moonlight Garden: A Complete GuideClimate-Resilient Planting: Future-Proofing Your GardenThrow Away the Rules: The Rise of Chaos Gardening

Inspiration: Follow Us on InstagramThreads, BlueSkyTwitterTikTok and Pinterest.

Benefits of Pumpkins: More Than Just Autumn Decor

Pumpkins – The King of the Autumn Harvest

Autumn is a time of transition, where the vibrant hues of summer give way to the warm, earthy tones of fallen leaves. It is also the season where pumpkins take centre stage, adorning doorsteps, markets and dining tables alike. But these orange globes are far more than mere seasonal decor. Pumpkins boast a rich history and an array of benefits that extend well beyond their aesthetic appeal.

Pumpkins – The Autumn Garden

What Are Pumpkins?

Pumpkins are a type of squash belonging to the Cucurbitaceae family, which also includes cucumbers, melons and gourds. Native to North America, pumpkins are typically characterised by their round shape and smooth, slightly ribbed skin. While they are most commonly found in a bright orange hue, they can also appear in a variety of shades including yellow, white, green, and even blue.

The plant itself features large, sprawling vines with broad leaves and striking yellow flowers. These flowers, known as pumpkin blossoms, are edible and often used in culinary dishes. As a fruit, pumpkins develop from the female flowers after pollination, which is typically facilitated by bees and other pollinating insects.

Pumpkins are incredibly versatile. In culinary terms, they can be roasted, puréed or baked and are a staple in both sweet and savoury dishes. Their flesh is dense and slightly sweet, making them perfect for pies, soups and bread. Even the seeds, known as pepitas, are edible and often roasted for a nutritious snack. Additionally, pumpkin flowers and leaves can also be cooked and consumed, offering a wide range of uses from a single plant.

In addition to their culinary applications, pumpkins are frequently used for ornamental purposes, especially during the autumn season. They serve as iconic symbols of Halloween and harvest festivals, often carved into jack-o’-lanterns or displayed as part of festive décor.

From a nutritional standpoint, pumpkins are low in calories but rich in essential vitamins and minerals. They are packed with Vitamin A, which is crucial for maintaining good vision and supporting the immune system. They also contain Vitamin C, fibre and antioxidants, which contribute to overall health and well-being.

The medicinal properties of pumpkins have also been recognised in various cultures. Traditional remedies often utilise pumpkin flesh and seeds to treat ailments ranging from inflammation to digestive issues. Even in modern times, the health benefits of pumpkins continue to be explored and appreciated.

History of Pumpkins – Legends About Pumpkins

Pumpkins have a storied history that dates back to ancient times, with evidence of their cultivation in Central America as early as 7,500 B.C. Over millennia, they have traversed continents and cultures, accruing an array of legends and folklore along the way. One of the most famous tales is that of “Stingy Jack,” a cunning man from Irish mythology. According to the legend, Jack tricked the devil on several occasions, and upon his death, was denied entry to both heaven and hell. Instead, he was condemned to wander the earth with only a hollowed-out turnip illuminated by a burning coal to guide him. This eerie tale laid the groundwork for the modern jack-o’-lantern tradition.

When Irish immigrants brought the story of Stingy Jack to America, they discovered that pumpkins, native to their new homeland, were far more suitable for carving than turnips. The practice of creating jack-o’-lanterns from pumpkins quickly caught on and became a staple of Halloween celebrations. Beyond the legend of Stingy Jack, pumpkins have also been featured in various other cultural stories and rituals. In some Native American tribes, pumpkins were revered not just as a food source, but also for their symbolic importance in ceremonies and seasonal rites.

In Europe, the pumpkin’s close relatives, the gourd and squash, also played roles in ancient agricultural practices and festivals. The Romans and Greeks incorporated gourds into their seasonal feasts and celebrations, signifying the harvest’s abundance. As pumpkins made their way back to Europe from the New World, they were initially viewed as exotic curiosities before becoming integrated into local cuisines and customs.

These rich cultural tapestries illustrate how pumpkins have transcended mere agricultural roots to become enduring symbols embedded in folklore and tradition. Each tale and legend adds to the mystique of the pumpkin, enriching its place in our seasonal and cultural landscape.

Why Are They Important for Halloween?

The connection between pumpkins and Halloween has deep roots in history and symbolism. The Celtic festival of Samhain, which marked the end of the harvest and the beginning of winter, laid the groundwork for many Halloween traditions. During Samhain, it was believed that the veil between the worlds of the living and the dead was thinnest, allowing spirits to roam freely. To ward off these spirits, people carved menacing faces into turnips and gourds and placed them near doorways and windows.

When these traditions migrated to America, the native pumpkin, being larger and easier to carve than turnips, quickly became the preferred choice for creating these protective lanterns. The transformation of the pumpkin into the iconic jack-o’-lantern we know today was thus a fusion of old-world customs and new-world resources.

The symbolism of the jack-o’-lantern extends beyond mere decoration. The flickering light inside a carved pumpkin is thought to represent a soul trapped in purgatory, echoing the legend of Stingy Jack. This aligns with the broader theme of Halloween, which revolves around the supernatural and the thinning boundary between life and death.

Pumpkins also embody the essence of the autumn harvest. Their appearance in late summer and early autumn makes them ideal symbols for a season characterised by abundance and transition. The act of carving pumpkins has evolved into a popular activity that brings people together, fostering a sense of community and celebration.

In essence, pumpkins have become an integral part of Halloween due to their historical significance, symbolic meanings, and cultural adaptability. Their journey from ancient festivals to modern-day celebrations illustrates their enduring appeal and versatility.

How to Grow Them

Growing pumpkins demands patience and a bit of horticultural know-how. Begin by choosing a sunny location in your garden with well-drained, fertile soil. After the last frost of spring, when the soil has sufficiently warmed, plant your pumpkin seeds. Space the seeds approximately 2.5 to 3 feet apart in small mounds to allow for ample growth and air circulation. Regular and consistent watering is crucial, especially during the flowering and fruiting stages to ensure healthy development.

Watch out for common pests such as squash bugs and aphids, which can be detrimental to your pumpkin plants. Organic pest control methods, such as neem oil or introducing beneficial insects like ladybirds, can be effective in managing these pests without resorting to harsh chemicals. Additionally, be vigilant for signs of powdery mildew, a common fungal disease that can affect pumpkin leaves. Ensuring proper spacing and airflow around your plants can help mitigate this issue.

Pumpkins benefit from a balanced fertiliser regimen. Start with a fertiliser high in nitrogen to encourage leaf growth in the early stages. As the plants begin to flower, switch to a fertiliser with higher levels of phosphorus and potassium to support blossom and fruit development. Mulching around the base of the plants can help retain soil moisture and reduce weed competition.

Hand pollination can be an effective technique if you’re facing poor fruit set. Using a small brush, gently transfer pollen from the male flowers to the female flowers to improve the chances of successful pollination and fruit development.

By mid to late summer, you should start to see pumpkins forming on the vines. Once they reach their mature size and develop a hard rind, they can be harvested. With proper care and attention, your pumpkins will be ready to enhance your autumn festivities.

What Are Their Benefits?

Pumpkins offer a multitude of health benefits due to their rich nutritional profile. They are an excellent source of Vitamin A, which is essential for maintaining good vision and supporting immune function. The high levels of Vitamin C found in pumpkins also contribute to a robust immune system, while the fibre content aids in digestion and promotes a feeling of fullness, which can be beneficial for weight management.

In addition to vitamins, pumpkins are packed with antioxidants, such as beta-carotene, which can help combat oxidative stress and reduce the risk of chronic diseases. Beta-carotene, in particular, has been studied for its potential role in lowering the risk of certain cancers and protecting against heart disease.

Beyond their health advantages, pumpkins are incredibly versatile in the kitchen. Their naturally sweet, earthy flavour enhances both sweet and savoury dishes, making them a staple in autumnal recipes. From creamy soups and comforting stews to traditional pies and even lattes, pumpkins can be incorporated into a variety of meals.

Pumpkin seeds, or pepitas, are another valuable component of the fruit. They are a nutritious snack, rich in protein, healthy fats, and essential minerals such as magnesium and zinc. These seeds are known for their potential to improve heart health, support prostate health, and offer anti-inflammatory benefits.

In summary, pumpkins are a nutritional powerhouse that can be enjoyed in numerous culinary applications. Their health benefits and versatility make them much more than just a seasonal decoration, providing valuable nutrients that contribute to overall well-being.

Further Reading: Understanding the Perfect Harvest Time, Celebrate the Bounty of Autumn On October 21st Apple Day

Understanding the Perfect Harvest Time

Understanding the Perfect Harvest Time

Recognising Ripeness

Knowing when to harvest is crucial for getting the best flavour and nutrition from your vegetables. Root vegetables like carrots and beetroots should be firm and have a vibrant colour. For leafy greens, look for lush and full leaves. Tomatoes should be slightly soft to the touch but still firm enough to hold their shape.

The Garden Harvest

Timing is Everything

Harvesting your vegetables at the right time of day can also make a difference. Early morning is often the best time, as vegetables are most hydrated from the overnight dew. Avoid harvesting in the heat of the day, which can cause wilting and reduce the quality of your produce.

Weather Watch

Paying attention to the weather forecast can help you decide the best times to harvest. For root vegetables, waiting until after a light frost can actually enhance their sweetness. However, ensure that you harvest before any hard frost to avoid damage.

Harvesting Techniques for Different Vegetables

Root Vegetables

Root vegetables like carrots, beetroots and potatoes need to be carefully dug out. Use a garden fork to gently lift them from the ground, being cautious not to damage them. Brush off excess dirt, but don’t wash them until you’re ready to use them to prevent rot.

Leafy Greens

For leafy greens like spinach, kale and lettuce, use sharp scissors or a knife to snip the leaves off just above the base. This encourages new growth and prolongs your harvest season. Always choose the outer leaves first to allow the inner leaves to mature.

Fruiting Vegetables

Tomatoes, cucumbers and peppers need to be picked at their prime. Twist or cut them off the plant to avoid damaging the stems. For tomatoes, consider leaving them on a windowsill to ripen if they haven’t fully matured on the vine.

Storing Your Harvest

Cool and Dark Spaces

Root vegetables like potatoes, carrots and beetroots store best in cool, dark places. A cellar or a cool basement is ideal. Store them in breathable containers like wooden crates or burlap sacks to allow airflow and prevent mould.

Refrigeration

Leafy greens and herbs should be rinsed, dried, and stored in the refrigerator. Use airtight containers or plastic bags with a damp paper towel inside to maintain moisture levels. This keeps them fresh and crisp for longer periods.

Freezing for Longevity

Freezing is an excellent way to preserve vegetables that you can’t consume immediately. Blanch vegetables like beans, peas and corn by boiling them briefly and then plunging them into ice water. Once cooled, place them in airtight bags and freeze.

Fermenting and Pickling

Fermentation Basics

Fermentation is a traditional method of preserving vegetables that also enhances their nutritional value. Vegetables like cabbage (for sauerkraut) and cucumbers (for pickles) can be fermented by submerging them in a saltwater brine and allowing natural bacteria to do their work.

Pickling Steps

Pickling involves preserving vegetables in a vinegar solution. This method is perfect for cucumbers, carrots and onions. Sterilise your jars, pack them with vegetables and a mix of spices, then pour over a hot vinegar solution. Seal the jars and store them in a cool, dark place.

Benefits of Fermented Foods

Fermented foods are great for gut health due to their probiotic content. They also add a tangy flavour to your meals and can be stored for several months, making them a practical method of preservation.

Drying and Dehydrating

Sun Drying

Sun drying is an ancient method of preserving vegetables like tomatoes and herbs. Simply slice your vegetables thinly and lay them out on a mesh screen in a sunny spot. Cover with a fine cloth to keep insects away and turn them regularly.

Using a Dehydrator

A food dehydrator offers a more controlled environment for drying vegetables. This method is suitable for mushrooms, peppers and herbs. Follow the manufacturer’s instructions for the best results and store the dried vegetables in airtight containers.

Advantages of Dried Vegetables

Dried vegetables are lightweight and take up less storage space. They can be rehydrated for use in soups, stews and casseroles, ensuring you have access to your garden’s bounty throughout the year.

Creating a Root Cellar

Ideal Conditions

A root cellar is one of the best ways to store a large harvest of root vegetables. The ideal conditions are cool temperatures, high humidity and good ventilation. The temperature should remain between 0°C and 4°C, with a humidity level of around 95%.

Building Tips

If you’re constructing a root cellar, consider using materials that provide good insulation, like straw bales or earth. Ensure that there is adequate ventilation to prevent mould and rot. You can also convert a corner of your basement into a root cellar with proper adjustments.

Maintenance

Check your stored vegetables regularly for signs of spoilage. Remove any that show signs of rot to prevent it from spreading to other vegetables. Proper maintenance will ensure your root cellar remains an effective storage solution.

Using Cold Frames and Cloche

Extending the Season

Cold frames and cloches can help extend the growing season into autumn and even early winter. These structures provide a microclimate that protects young plants from frost and allows for continued growth.

Building a Cold Frame

A cold frame is a low, box-like structure with a transparent lid. You can build one using reclaimed wood and an old window. Place it over your garden bed to protect seedlings and extend the harvest season for leafy greens and herbs.

Using a Cloche

A cloche is a smaller, portable version of a cold frame. It can be placed over individual plants or rows. Use cloches to protect young plants from early frosts or to give warmth-loving plants like tomatoes a longer growing season.

The Benefits of Seasonal Eating

Nutritional Advantages

Eating vegetables in season means you’re consuming them at their peak nutritional value. Seasonal vegetables are fresher, tastier and often grown without the need for excessive pesticides.

Environmental Impact

Seasonal eating reduces the carbon footprint associated with transporting out-of-season produce. It supports local farming and reduces the need for long-haul transportation, which is better for the planet.

Economic Savings

Seasonal vegetables are often more affordable because they are abundant and don’t require expensive growing conditions. Buying in season helps you save money while enjoying the freshest produce available.

Further Reading: Foraging, Guide to Storing Fruit

Follow us on Instagram for Daily Inspiration

The Essential Guide to Crop Rotation in Your Kitchen Garden

Is your kitchen garden looking a bit tired? Crop rotation could be the answer to rejuvenating your small space and boosting your harvests. This age-old technique involves changing the type of crops grown in a particular area each season to improve soil health and reduce pest issues.

What Is Crop Rotation?

Crop rotation is a strategic gardening practice where different crops are planted in a specific sequence over several seasons. This method helps maintain soil fertility and structure, breaks pest and disease cycles and can even improve crop yields.

Crop Rotation

Benefits of Crop Rotation

Here are some key benefits of implementing crop rotation in your kitchen garden:

Improved Soil Health: Different plants have varying nutrient needs and contribute different organic matter to the soil. Rotating crops ensures a balanced nutrient uptake.

Pest and Disease Control: Many pests and diseases are crop-specific. Rotating crops reduces the likelihood of these problems recurring.

Enhanced Yields: With healthier soil and fewer pests, your plants are more likely to thrive, leading to better harvests.

Steps to Implement Crop Rotation

Step 1: Identify Crop Families

The first step is to group your current crops into families:

Legumes (e.g., peas, beans)

Potatoes (e.g., potatoes, sweet potatoes)

Roots (e.g., carrots, beets)

Brassicas (e.g., cabbage, broccoli)

Salad Greens (e.g., lettuce, spinach)

Step 2: Plan Your Rotation

With a small garden (less than 100 square feet), try a simple four-year rotation plan:

Year 1:

Bed 1: Legumes

Bed 2: Brassicas

Bed 3: Roots

Bed 4: Potatoes

Bed 5: Salad Greens

Year 2:

Bed 1: Brassicas

Bed 2: Roots

Bed 3: Potatoes

Bed 4: Salad Greens

Bed 5: Legumes

Year 3:

Bed 1: Roots

Bed 2: Potatoes

Bed 3: Salad Greens

Bed 4: Legumes

Bed 5: Brassicas

Year 4:

Bed 1: Potatoes

Bed 2: Salad Greens

Bed 3: Legumes

Bed 4: Brassicas

Bed 5: Roots

Step 3: Prepare Your Soil

Loamy soil with good drainage is ideal for most crops. Before planting, enrich your soil with compost or well-rotted manure to provide ample nutrients for the new crops.

Step 4: Plant and Maintain

Follow your rotation plan and plant your crops in the designated beds. Regularly monitor for pests and diseases and keep the soil healthy with organic mulches and amendments.

Step 5: Record and Adjust

Keep a gardening journal to track what you plant each year and any observations about plant health and yield. Use this information to refine your rotation plan over time.

Implementing crop rotation in your small kitchen garden is a smart way to maintain soil health, manage pests and boost your yields. Start planning your crop rotation today to create a more productive and sustainable garden.

Try our SowItGrowItandFeast Grow Your Own Kits here

Follow Us on Instagram for Daily Gardening Inspiration

Grow Stronger Together Gardening with Companion Planting

In the world of gardening, there’s a practice that has been gaining traction for its natural and effective approach to cultivating healthier and more productive vegetable gardens. It’s called companion planting, and it’s changing the way we grow our food. Understanding and implementing companion planting could be a game-changer.

What Is Companion Planting?

Companion planting is an age-old gardening practice where different plant species are grown close together to benefit one another. This technique not only maximises space but also helps to enhance growth, improve flavour, and protect plants from pests. It’s like having a best friend in your garden who always has your back.

Benefits of Companion Planting

One of the primary benefits of companion planting is pest control. Certain plants naturally repel pests that would otherwise ravage their neighbours. For example, marigolds release a chemical that deters nematodes, while basil can ward off mosquitoes and flies. By strategically placing these plants together, you create a natural barrier.

Another significant advantage is improved plant growth. Some plants release chemicals through their roots that can stimulate faster growth in their companions. Additionally, taller plants can provide shade for sun-sensitive species, and deep-rooted plants can bring up nutrients from lower soil layers, making them available to shallow-rooted neighbours.

Companion planting also promotes biodiversity. Having a variety of plants in your garden creates a more resilient ecosystem, helping to prevent diseases and pest infestations from spreading rapidly. It fosters a balanced environment where beneficial insects thrive and pollinate flowers, leading to a more productive garden.

How Does Companion Planting Work?

Companion planting works through a combination of physical, chemical, and biological interactions between plants. Understanding these interactions can help gardeners make informed decisions about which plants to pair together.

Physical Interactions

Physical interactions involve the structural benefits that plants can provide to one another. For instance, tall plants like corn can act as natural trellises for climbing beans, while low-growing ground covers like nasturtiums can protect the soil from erosion and suppress weed growth.

Chemical Interactions

Chemical interactions occur when plants release substances through their roots or leaves that impact neighbouring plants. These substances can either inhibit or stimulate growth. For example, the roots of sunflowers exude allelopathic chemicals that suppress the growth of nearby plants, while beans release nitrogen into the soil, enriching it for other plants.

Biological Interactions

Biological interactions encompass the relationships between plants and other organisms in the garden, such as insects, fungi, and bacteria. Flowers like calendula attract predatory insects that feed on aphids, while legumes host nitrogen-fixing bacteria in their root nodules, which benefit neighbouring plants by increasing soil fertility.

Aliums (Alliums)

Alliums, including garlic, onions, and leeks, are excellent companions for many vegetables. They can help deter pests such as aphids, spider mites, and carrot flies. Their strong scent confuses and repels these pests, protecting more vulnerable plants.

Garlic

Garlic is a powerhouse in companion planting. It can be planted alongside tomatoes to repel red spider mites and protect strawberries from fungal infections. Additionally, garlic’s sulphur compounds have antifungal properties that benefit many plants.

Onions

Onions are another allium that pairs well with a variety of vegetables. Plant them near carrots to help deter carrot flies, or next to beets to ward off aphids. However, avoid planting onions near legumes, as they can inhibit their growth.

Leeks

Leeks are effective companions for celery and carrots. They can help reduce pests like carrot root fly and leek moth. When planting leeks, ensure they have enough space to grow without crowding their neighbours.

Brassicas (Brassica)

Brassicas, such as cabbage, broccoli, and kale, can benefit greatly from companion planting. They are prone to pests like cabbage worms and aphids, but strategic planting can help mitigate these issues.

Cabbage

Cabbage can be protected from cabbage worms by planting it alongside dill, which attracts beneficial insects that prey on these pests. Additionally, planting cabbage with mint can help deter aphids.

Broccoli

Broccoli benefits from companions like rosemary and sage, which can repel cabbage loopers. Additionally, planting clover as a ground cover around broccoli can improve soil health by fixing nitrogen.

Kale

Kale is a favourite among many gardeners, but it can attract pests like aphids and flea beetles. Planting kale with marigolds or nasturtiums can help keep these pests at bay. Also, companion planting kale with beets can improve growth and flavour.

Cucurbits (Cucurbitaceae)

Cucurbits, including cucumbers, courgettes, and melons, thrive with the right companions. They are prone to pests like cucumber beetles and squash bugs, but companion planting can help address these issues.

Cucumbers

Cucumbers benefit from being planted near radishes, which can deter cucumber beetles. Additionally, planting nasturtiums near cucumbers can help repel aphids and squash bugs.

Courgettes

Courgettes can be protected from squash bugs by planting it alongside marigolds or tansy. These plants emit scents that confuse and repel the pests, keeping your zucchini safe.

Melons

Melons can benefit from companion planting with radishes and marigolds. Radishes deter cucumber beetles, while marigolds repel nematodes. Additionally, planting melons with beans can improve soil fertility.

Leaves and Salad Greens

Leafy greens like lettuce and spinach can benefit from companion planting. They are susceptible to pests like slugs and aphids, but strategic planting can help manage these issues.

Lettuce

Lettuce can be protected from slugs by planting it near chives or garlic. These alliums deter slugs and help keep your lettuce safe. Additionally, planting radishes near lettuce can help deter aphids.

Spinach

Spinach can be protected from pests like aphids and leaf miners by planting it alongside basil or nasturtiums. These companion plants help deter pests and improve the overall health of your spinach.

Legumes (Leguminosae)

Legumes, such as beans and peas, are excellent companions for many vegetables. They fix nitrogen in the soil, enriching it for other plants. Additionally, they can help deter pests like aphids and bean beetles.

Beans

Beans are versatile companions that pair well with a variety of vegetables. Plant them near corn to provide support for climbing beans, or alongside brassicas to improve soil fertility. Avoid planting beans near alliums, as they can inhibit each other’s growth.

Peas

Peas can be planted alongside carrots to help deter carrot flies. Additionally, planting peas with radishes can help deter aphids and improve soil health.

Roots (Root Vegetables)

Root vegetables, including carrots, beets, and radishes, can benefit from companion planting. They are susceptible to pests like root maggots and carrot flies, but strategic planting can help address these issues.

Carrots

Carrots can be protected from carrot flies by planting them alongside onions or leeks. These alliums emit scents that deter the pests and keep your carrots safe. Additionally, planting dill near carrots can attract beneficial insects.

Beets

Beets can benefit from companion planting with brassicas like broccoli or kale. These plants improve soil health and help deter pests. Additionally, planting beets with radishes can help deter aphids.

Radishes

Radishes are excellent companions for cucumbers and melons. They deter cucumber beetles and improve soil health. Additionally, planting radishes near lettuce can help deter aphids.

Solanaceae (Nightshades)

Solanaceae, including tomatoes, peppers, and potatoes, are some of the most popular garden vegetables. They can benefit greatly from companion planting, which helps manage pests and improve growth.

Tomatoes

Tomatoes can be protected from pests like aphids and whiteflies by planting them alongside basil or marigolds. These companion plants emit scents that deter pests and improve the overall health of your tomatoes.

Peppers

Peppers can benefit from companion planting with herbs like basil or oregano. These herbs help deter pests and improve growth. Additionally, planting peppers with beans can improve soil fertility.

Potatoes

Potatoes can be protected from pests like potato beetles by planting them alongside marigolds or nasturtiums. These companion plants help deter pests and improve the overall health of your potatoes.

Companion planting is a powerful tool for any gardener looking to create a healthier, more productive vegetable garden. By understanding the relationships between different plants and strategically placing them together, you can enhance growth, improve flavour and protect your crops from pests. Companion planting offers a natural and effective way to elevate your gardening game.

Start implementing companion planting in your vegetable garden today and watch your plants grow stronger together. Happy gardening!

Futher Reading: The Ultimate Guide to Seed Ordering for your Home Vegetable Patch, The Benefits of Growing your own Vegetables

Try our SowItGrowItandFeast Grow Your Own Range

Transform Your Allotment into a Biodiversity Haven

Are you ready to take your allotment to the next level? It’s about more than just growing vegetables and flowers. By fostering biodiversity, you can turn your plot into a thriving sanctuary for wildlife, pollinators and diverse plant species. Not only will this enhance the natural beauty of your space, but it will also support natural pest control, improve soil health and enhance pollination, creating a robust and productive garden.

The Magic of Biodiversity

Why Biodiversity Matters

Biodiversity is the variety of life in a particular habitat or ecosystem. On your allotment, this means encouraging a diverse range of plants, insects, birds and other wildlife. A biodiverse garden is not only more resilient to pests and diseases but also more productive.

A study by the University of California found that gardens with high biodiversity had fewer pest problems and higher crop yields. By attracting a variety of organisms, you create a balanced ecosystem where natural predators keep pests in check.

Benefits for Gardeners

For allotment holders, biodiversity offers numerous benefits. A diverse garden can produce more abundant and varied crops. It can also reduce the need for chemical pesticides and fertilisers, saving you money and making your gardening practices more sustainable.

Additionally, a biodiverse garden is a joy to behold. Imagine your plot buzzing with bees, fluttering with butterflies and filled with the song of birds. It’s not just good for the environment; it’s good for the soul.

Habitat Creation

Building Homes for Wildlife

Creating habitats for wildlife on your allotment is a fantastic way to boost biodiversity. Start by providing a variety of shelters for different creatures. Birdhouses, bat boxes and bug hotels are excellent additions that can attract beneficial wildlife to your garden.

Consider leaving some areas wild. Piles of leaves, logs and stones can provide shelter for hedgehogs, frogs, and insects. A small pond or water feature can attract amphibians and aquatic insects, further enhancing the diversity of your allotment.

Planting for Diversity

Choose a range of plants that offer different types of shelter and food for wildlife. Native plants are particularly valuable as they are well-adapted to local conditions and support a wide range of insects and animals.

Include trees, shrubs, perennials and annuals in your planting scheme. This variety not only looks beautiful but also provides habitats for different species at different times of the year.

Creating Layers

Think about your garden in layers. The canopy layer might include taller trees and shrubs, the understorey could be smaller shrubs and perennials and the ground layer can be covered with low-growing plants and ground covers. Each layer provides a different habitat and increases the overall biodiversity of your allotment.

Pollinator Support

The Role of Pollinators

Pollinators such as bees, butterflies and hoverflies are essential for the successful growth of many crops. They transfer pollen from one flower to another, enabling plants to produce fruits and seeds. Without pollinators, many of our favourite fruits and vegetables would fail to set fruit.

Planting for Pollinators

To support pollinators, plant a variety of flowers that bloom at different times throughout the year. This ensures that there is always a food source available. Choose flowers with single blooms rather than double ones, as they provide easier access to nectar and pollen.

Lavender, foxgloves and sunflowers are all excellent choices for attracting bees and butterflies. Herbs like rosemary, thyme and sage are also great for pollinators and can be used in your cooking.

Providing Water and Shelter

Pollinators need more than just food. A shallow dish of water with pebbles for resting can provide a vital drinking spot. Avoid using pesticides, as these can harm pollinators. Instead, opt for organic methods of pest control.

Soil Health

The Foundation of Biodiversity

Healthy soil is the foundation of a thriving, biodiverse allotment. Soil teems with life, from earthworms and beetles to fungi and bacteria. These organisms play crucial roles in breaking down organic matter, cycling nutrients and improving soil structure.

Composting and Mulching

Adding compost and mulch to your soil can significantly boost its health. Compost provides essential nutrients and helps retain moisture. Mulch, on the other hand, helps regulate soil temperature, suppresses weeds and slowly releases nutrients as it breaks down.

Practice crop rotation to prevent the depletion of specific nutrients and reduce the risk of soil-borne diseases. Different plants have different nutrient needs and pest susceptibilities, so rotating them each year keeps your soil balanced and healthy.

Avoiding Soil Compaction

Compacted soil can restrict root growth and reduce the effectiveness of water and nutrient uptake. To avoid compaction, try to minimise walking on your garden beds. Use pathways and stepping stones and consider using raised beds to maintain loose, aerated soil.

The Future of Allotments and Biodiversity

Sustainable Practices

Incorporating biodiversity into your allotment practices is not just about improving your own garden; it’s about contributing to a larger environmental effort. Sustainable gardening practices help combat climate change, support local wildlife populations and ensure that future generations can enjoy the benefits of a healthy ecosystem.

Community Involvement

Share your knowledge and success with your local community. Encourage other allotment holders to adopt biodiverse practices. Community gardens and allotment societies can play a significant role in promoting and supporting biodiversity.

Host workshops, participate in seed swaps and collaborate on larger biodiversity projects. Together, we can make a significant impact.

Continuous Learning

Biodiversity is a dynamic and evolving field. Stay informed about the latest research and techniques. Join gardening clubs, subscribe to relevant publications and participate in online forums. The more you learn, the better equipped you’ll be to create and maintain a thriving, biodiverse allotment.

Biodiversity on your allotment is not just a trend; it’s a crucial aspect of sustainable gardening that offers numerous benefits. By creating habitats, supporting pollinators and maintaining healthy soil, you can turn your allotment into a vibrant, productive and resilient ecosystem.

Remember, every small step counts. Start with one or two changes and gradually incorporate more biodiverse practices into your gardening routine. You’ll soon see the rewards in the form of healthier plants, increased yields and a more enjoyable gardening experience.

Further Reading: National Allotment Association, Why Bees are Essential to our Gardens

The World of Allotments and Their Future

What is an Allotment?

Have you ever walked past a charming patch of land filled with vibrant plants, fresh vegetables and blossoming flowers and wondered what it was? That, dear readers, is likely an allotment. An allotment is a small plot of land rented to individuals, usually for growing food crops, flowers and occasionally, small livestock. These parcels are provided by local councils or private owners and serve as a sanctuary where urban dwellers can indulge their green thumbs.

Allotments are more than just a piece of land; they are a way of life. They offer a respite from the concrete jungle, allowing people to connect with nature, grow their own food and experience the simple joys of gardening. For many, an allotment is a haven of peace and a source of home-grown produce that promotes healthier living.

The Joy of Allotments

The Concept of Community

One of the magical aspects of allotments is the sense of community they foster. People from all walks of life come together, sharing tips, seeds and sometimes even their harvests. It’s a place where friendships bloom as quickly as the plants. Imagine being part of a network of enthusiastic gardeners, all working towards a common goal—cultivating a beautiful and productive garden.

A Sustainable Choice

In an age where sustainability is becoming increasingly important, allotments serve as a shining example of eco-friendly living. They reduce the carbon footprint by cutting down on transportation and packaging and help in waste reduction through composting. Allotments also support biodiversity, providing a habitat for various species of plants and animals.

What is the History of Allotments?

The origins of allotments date back several centuries and are deeply rooted in British history. The concept began during the early 19th century as a response to the enclosure movements, which left many rural poor without land to cultivate. This led to the creation of “field gardens” or “allotments” where people could grow their own food.

Evolution Through the Ages

The allotment movement gained significant momentum during the World Wars. Known as “Victory Gardens” during this period, these plots became vital for food production as imports dwindled. Post-war, the popularity of allotments waned somewhat but saw a resurgence in the 1970s due to economic downturns and a growing interest in organic farming and self-sufficiency.

Modern-Day Relevance

Today, allotments are enjoying a renewed interest, driven by urbanisation, rising food costs and a desire for sustainable living. They have evolved from being merely a source of food to becoming a lifestyle choice that promotes well-being, community spirit and environmental stewardship.

The Benefits of Allotments

Allotments offer a plethora of benefits, making them an attractive option for many urban dwellers. Here are some of the most compelling advantages:

Physical and Mental Well-being

Gardening is a fantastic form of exercise that improves physical health. Activities like digging, planting, and weeding provide a moderate workout, enhancing strength, stamina, and flexibility. Beyond physical health, gardening has been shown to reduce stress, anxiety and depression. The act of nurturing plants and watching them grow can be incredibly therapeutic.

Fresh and Organic Produce

One of the primary benefits of having an allotment is access to fresh, organic produce. Growing your own fruits and vegetables ensures that you know exactly what goes into your food. It eliminates concerns about pesticides and other chemicals, promoting a healthier diet.

Financial Savings

In addition to health benefits, allotments can also lead to significant financial savings. Growing your own food reduces grocery bills and provides a sense of security. The initial investment in seeds and tools is quickly offset by the bountiful harvests, making allotments a cost-effective choice for many families.

The Disadvantages of Allotments

While allotments have numerous benefits, they are not without their challenges. It’s essential to consider these potential drawbacks before embarking on your allotment adventure.

Time Commitment

Gardening requires a substantial time commitment. Allotments need regular care and maintenance, including watering, weeding, and pest control. For those with busy schedules, finding the time to tend to an allotment can be challenging.

Weather Dependency

Allotments are subject to the whims of the weather. Droughts, heavy rains, or unexpected frosts can devastate crops, leading to disappointment and frustration. While experienced gardeners can mitigate some risks, the unpredictability of the weather remains a significant factor.

Limited Space and Resources

Allotments are typically small plots of land, which can limit the variety and quantity of crops you can grow. Additionally, access to resources like water and compost may not always be convenient or readily available, requiring extra effort and planning.

What is the Future of Allotments?

The future of allotments looks promising, as more people recognise the value of sustainable living and self-sufficiency. However, there are several factors to consider when looking ahead.

Technological Advancements

Advancements in technology are making it easier for people to manage their allotments efficiently. From automated watering systems to apps that help with crop planning and pest control, technology is playing a significant role in modernising allotments.

Urban Planning and Policy Support

For allotments to thrive, support from local councils and urban planners is crucial. Policies that promote the allocation of green spaces for community gardening and provide resources and funding can ensure the continued success of allotments.

Community Engagement

Building strong community networks around allotments will be essential for their future. Encouraging participation, sharing knowledge, and fostering a sense of collective responsibility can help sustain the allotment culture for generations to come.

Allotments are a timeless practice that brings a multitude of benefits to individuals and communities alike. From their rich history to their modern-day relevance, allotments offer a unique way to connect with nature, promote sustainability and enjoy fresh, organic produce. While there are challenges to consider, the rewards of having an allotment far outweigh the drawbacks.

For those inspired to start their own allotment or learn more about sustainable gardening practices, consider reaching out to local gardening clubs or community groups. They can provide valuable insights, resources and a sense of camaraderie as you embark on your allotment journey.

Are you ready to dig in and start your own allotment? Join the growing community of gardeners who are discovering the joys of allotment gardening. Happy Gardening!

For some grow your own inspiration, they our SowItGrowItandFeast Range

Follow us on Instagram for daily Gardening Inspiration

Further Reading: Transforming your Allotment into a Biodiversity Haven